
This blog post is part of a series of blogs designed to help a business understand the interaction between Dynamics GP and Power BI, how to setup Power BI with Dynamics GP and what some of the options are for this functionality. This write up was done using Dynamics GP 2018.
To view the full list of the series, click here.
How to publish a custom SQL View to Power BI
If you follow my blogs, webinars or in person talks, you know that I am a frequent visitor to Victoria Yudin’s website. Victoria (a fellow MVP) has many valuable SQL scripts right on her blog. I am often returning to her site to grab a SQL script… and this exercise is no different. I am using her Current Payables Aging Detail script.
This write up assumes you have already installed and configured your OData service – to learn more about those steps, please visit here.
Step 1: Create your SQL View
I copied the syntax from the URL above and simply pasted it into SSMS (SQL Server Management Studio). I changed my active database to my company database, and then executed the script. That’s it… the view called ‘view_Current_Payables_Aging_Detail’ is now available on my company database. Notice that Victoria even includes the grant statement to add the newly created view to the DYNGRP role at the bottom of her scripts. Nice!

Step 2: Add the New SQL View to the OData Data Sources
Navigate to: Tools/Setup/System/OData/Data Sources
Click on Add Objects in the Action section of your ribbon.

This will open the ‘Custom Data Sources’ Window. Scroll until you find the SQL View that you created in Step 1. Mark the check box, and then click OK.

Now you will be taken back to the Data Sources Window – hit ‘Refresh’ on the Data Sources Window. After the refresh is complete, you should see your view as an available Data Source to select. Mark the checkbox next to your view name and then choose OK.

Step 3: Publish the custom data source through OData
Navigate to: Tools/Setup/System/OData/Publish OData
You should see your new view available – Mark the checkbox next to your view and click OK. This will now make the view available through the OData URL.

To test this, go back to the Publish OData Window and copy the URL for your new SQL View. Paste the URL in a browser… if the connection works, you will see some data:

Step 4: Use New OData object in Power BI Desktop
Add a new page or report – then use ‘Get Data’ from the ribbon and select OData Feed. Paste in the URL from the Publish OData window in Dynamics GP.

Select the new View that you want to use in Power BI. Then choose ‘Load’

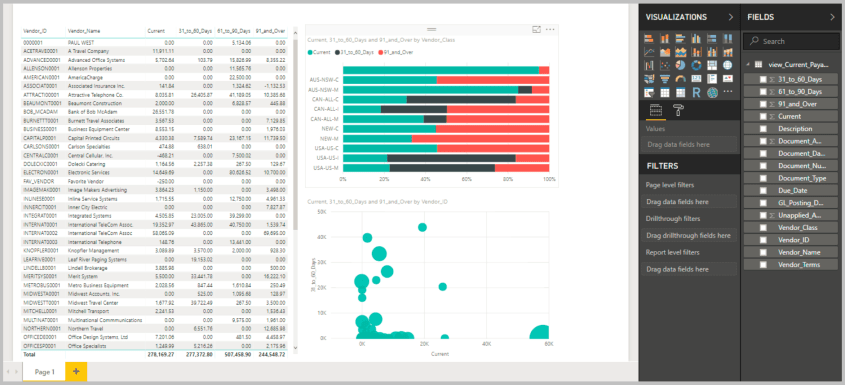
You are now ready to built your new report using your custom SQL View. Below is a screenshot of 3 tiles that I built using the SQL View above!
HIGH FIVES ALL AROUND!!!
To learn more about “Dynamics GP & Power BI” continue reading this series by clicking here.
Thanks for reading!
Shawn
Shawn Dorward
Microsoft MVP, Business Solutions
LifeHacks365.com | LinkedIn | Twitter | GPUG | MSDYNGP
Original Post: https://lifehacks365.com/2018/02/27/dynamics-gp-power-bi-publish-a-custom-sql-view/